Read the shape before the seam lines
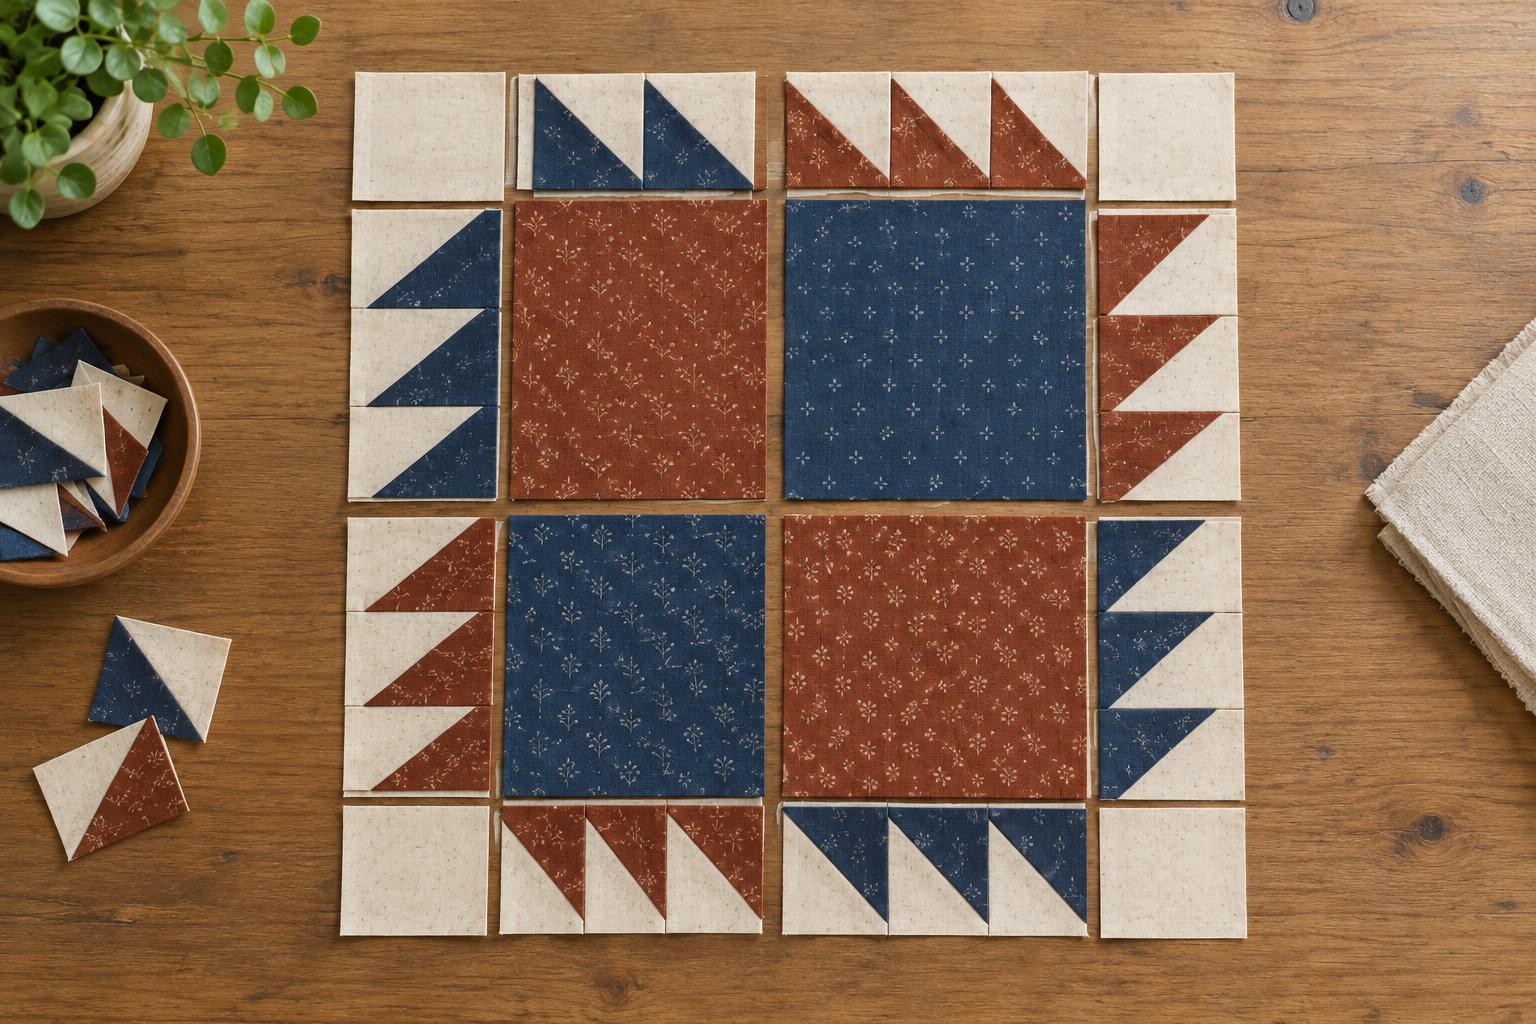
The Bear Paw is a traditional patchwork design that suggests a broad paw edged with pointed claws. Many versions place four paw units around a center area, with sashing or smaller squares separating them. The details vary from pattern to pattern, but the useful first step is the same: find the large squares that form the bodies of the paws, then look for the rows of small triangles that make the claws.
Try viewing the layout from a short distance. Each paw should read as one substantial shape with points along two adjacent sides. If the pieces seem like an unrelated collection of squares and triangles, temporarily cover the seams within each paw with your hands or a piece of paper. Seeing the larger silhouette helps you understand why the smaller units go where they do.
Identify the paw body and its corner
In a common construction, each paw starts with a large square of the main paw fabric. Two strips of smaller patchwork units sit against neighboring edges of that square. A small corner square fills the space where those strips meet. Together, these parts make one paw unit; the large square alone is only its body.
Before sewing, group each large square with the pieces intended for its two adjoining sides and corner. This is particularly helpful when a block uses several prints of similar value. Keep the corner squares separate from the claw units until you can see where the two rows meet. A corner square may look insignificant on its own, but placing it incorrectly can interrupt the outline of the paw or change the block’s symmetry.
Spot the claws in half-square triangles
The pointed claws are often made with half-square triangle units: small squares divided diagonally between two fabrics. In a typical two-colour version, one fabric matches the paw body and the other matches the background. When the units are turned correctly, the paw-coloured triangles create a row of points projecting away from the large square. Some patterns use different proportions or additional pieces, so follow your chosen diagram for the exact number of claws.
A half-square triangle can face in more than one direction, and that small rotation matters. Lay each claw unit beside its intended paw edge without sewing it. Check whether the coloured triangle connects visually to the paw while its point reaches toward the outside. Then scan the whole row: the points should have a consistent rhythm rather than alternating direction by accident. A phone photo of the correct layout can serve as a reminder while you stitch.
Arrange four paws without losing their direction
Once the individual paws make sense, place them in the full block layout. Four-paw versions often arrange the units around a central space, with their claws directed toward the outer edges of the block. Check the pattern rather than assuming every Bear Paw variation uses that orientation. Turning one completed paw can make a balanced layout look uneven even when every seam has been sewn accurately.
A simple layout check is to identify the two claw edges of each paw in turn. Point to the large square, trace one claw row, then trace the second. Repeat for the other three paws and compare their positions relative to the center. If the pattern includes sashing, center squares, or cornerstones, lay those pieces out too. They provide landmarks that make a rotated paw easier to notice before assembly.
Make a reliable pre-sewing routine
Sort cut pieces by role rather than by size alone: paw bodies, claw units, small corners, and any center or sashing pieces. If you are making several blocks, use separate trays, envelopes, or clearly marked piles for each block. Work from a flat layout when joining units, returning each finished piece to its original position. This reduces the chance of mixing similar-looking pieces or flipping a row between the work surface and the sewing machine.
Before joining a claw row to a paw body, check its length against the edge it will meet. Use the seam allowance specified by your pattern, and press seams in a direction that keeps the unit flat. After each paw is assembled, lay it back in the complete block and inspect the points and orientation again. Bear Paw blocks reward this brief pause: recognizing the paw and claw shapes early makes the final assembly much more straightforward.


