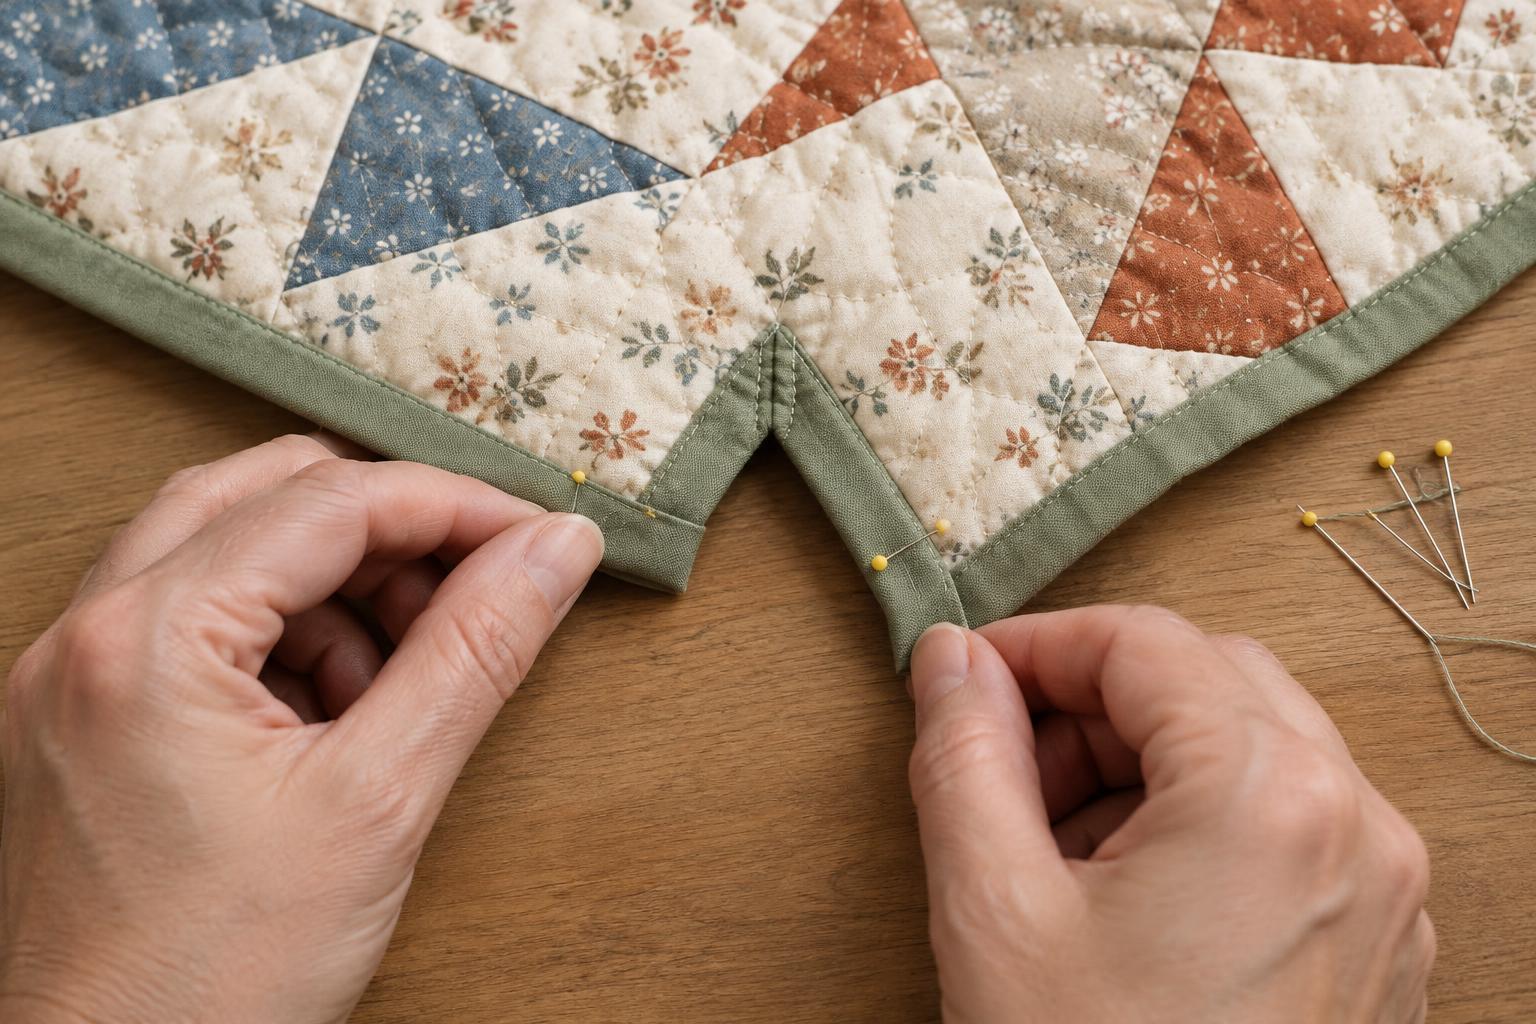
Understand the inward point
An inside corner is a point where a quilt’s edge turns inward, as it might between the points of a star or in the notch of a scalloped shape. Unlike an outside corner, it cannot simply be wrapped in an outward miter. The quilt’s edge needs enough room to open at the point, while the binding must follow the new direction without tugging or bunching.
The method below is for a defined inward point rather than a gentle concave curve. For a curve, ease the binding around the edge gradually instead of making a single clip at its deepest point. If your quilt has both shapes, work slowly enough to treat each one according to its shape.
Prepare the quilt and binding
Quilt the layers before trimming the shaped edge. Mark the final outline clearly, then trim with sharp scissors so you can control the cut near each point. If the layers tend to shift, secure them with a line of stitching close to the trimmed edge. Check that the inward point is deep enough to be distinct but not so narrow that there is little fabric left to support the binding.
A bias-cut, double-fold binding is a useful choice for a shaped quilt because it can follow curves as well as straight sections. The width that works best depends on your quilt’s thickness and the amount of binding you want visible. Test a short length around a point made from leftover quilt layers before cutting all your binding. Press the strip in half lengthwise, but leave its raw edges free to spread slightly as you sew.
Reinforce and clip the corner
Mark the binding attachment seam on the quilt near the inside point. With a short stitch length, sew a small reinforcing line across the point on or just inside that seam line. This helps keep the quilt layers secure when you make the clip. Check where the stitching will sit: the finished binding should cover it.
From the trimmed edge, clip into the inward point toward the reinforcing stitches. Stop just short of the attachment seam; do not cut through the stitching or beyond it. The clip lets the two sides of the quilt edge open so they can lie more nearly straight as you attach the binding. Make one careful cut rather than a broad notch, which could leave an exposed gap after the binding is turned.
Sew the binding around the point
Place the binding’s raw edges against the quilt’s raw edge on the front, with the folded edge toward the quilt’s centre. Sew at your chosen seam allowance as you approach the inside corner. Stop with the needle down near the point. Gently open the clipped quilt edge and bring the next side into position along the binding. Pivot and continue stitching, keeping the binding relaxed rather than stretching it to make it fit.
Pause if the fabric forms a pleat at the point. Often you can smooth the quilt layers and reposition the binding with the needle down before sewing on. If the point still puckers, remove a few stitches and try again; forcing the layers through the machine tends to make the fold more noticeable. On a quilt with several inside corners, check each one from the front before moving far past it.
Turn and secure the binding
Fold the binding over the raw edge to the back of the quilt. Along each side of the corner, turn it so the back coverage is even. At the inward point, arrange the extra binding into a small, flat fold that follows the V shape. A pin or clip can hold this fold while you adjust it. Look at the front before securing it: the point should remain clear, with no quilt edge showing and no binding pulled tight across the notch.
Hand-stitch the binding to the back with small, secure stitches, catching the folded layers at the point without sewing through to the front. Where the fold meets the corner, add a few close stitches so it cannot lift during use. Finally, inspect both sides and gently flex the corner. A sound finish covers the clipped edge, lies reasonably flat and allows the shaped quilt to keep its intended outline.


