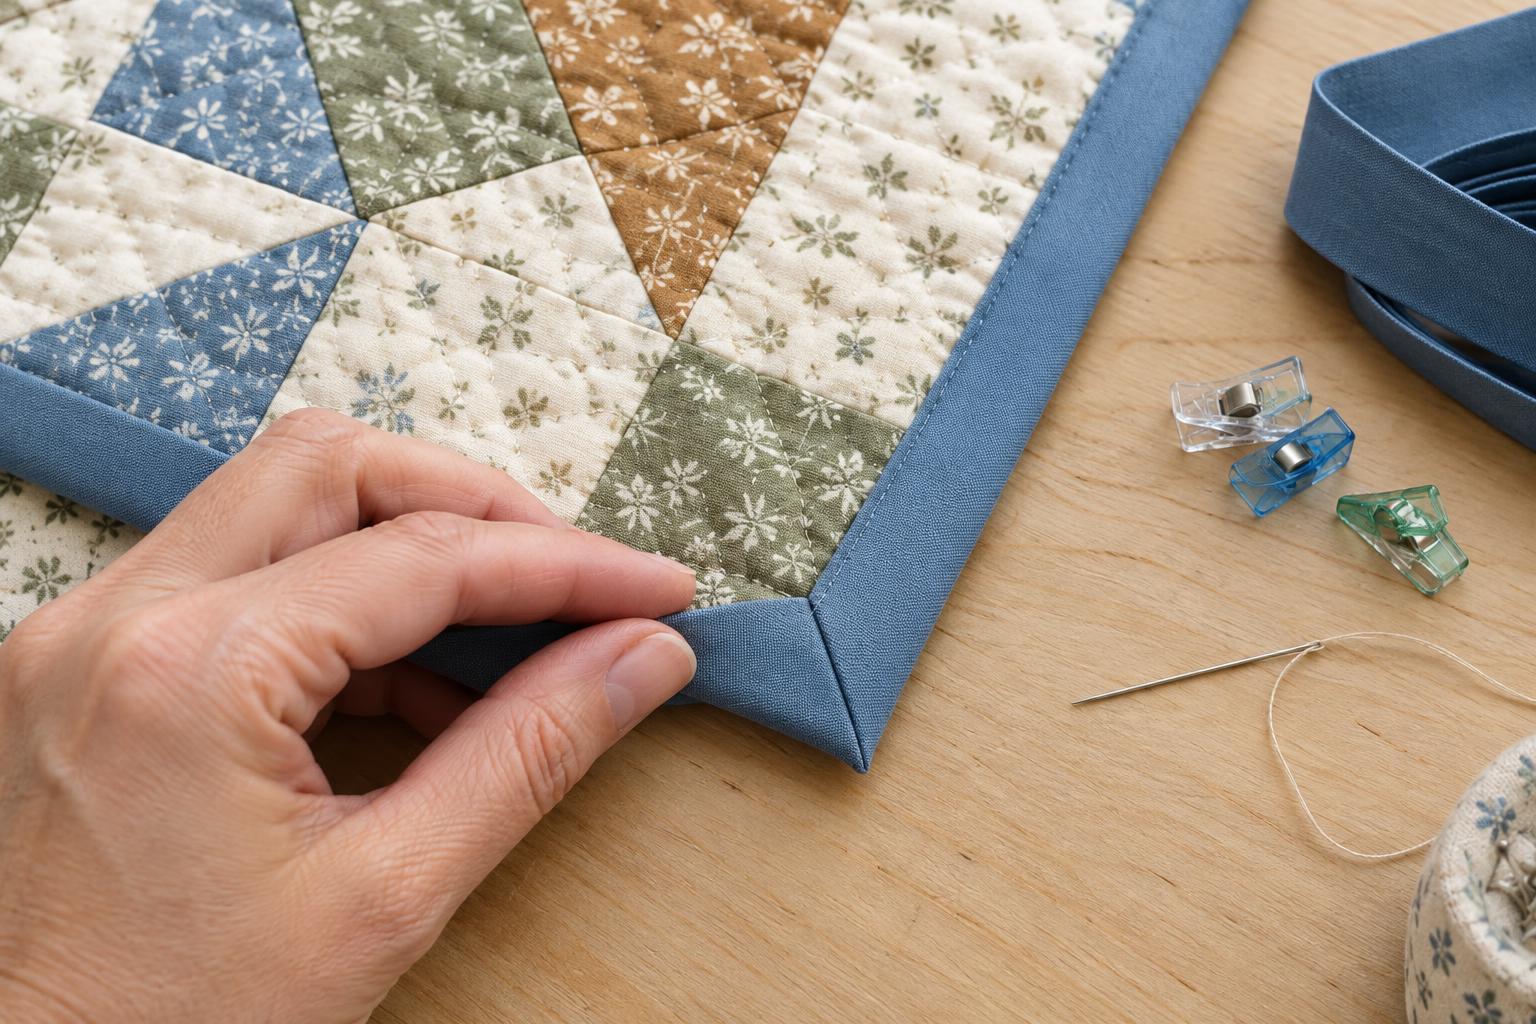
Prepare the edges and binding
A mitered corner is made by folding the binding so it turns neatly around the quilt’s edge without a bulky seam at the corner. The most important preparation is a consistent seam allowance. If you plan to attach binding with a ¼-inch seam, use that measurement at every corner; if your binding needs a different allowance, use the same measurement when deciding where to stop stitching.
After quilting, trim the backing and batting even with the quilt top. Check that the corners are square, but avoid trimming away points or narrow borders just to make the edges look straight. For a common double-fold binding, cut strips about 2½ inches wide, join them into one long strip, then press the strip in half lengthwise with wrong sides together. This width is a starting point, not a rule: thicker quilts or wider desired binding may need a different cut width. Press gently so the folded edge stays smooth.
Attach the binding up to the first corner
Place the binding on the front of the quilt, aligning its two raw edges with the quilt’s raw edge. Begin along a straight side rather than at a corner, leaving an unsewn tail of several inches for joining the ends later. Stitch with your chosen seam allowance, keeping the binding flat as you go. A walking foot can help feed the layers evenly, but careful guiding works too.
As you approach the first corner, measure your seam allowance back from the quilt’s edge and mark that stopping point if it helps. With a ¼-inch seam, stop ¼ inch before the edge. Secure the stitching and remove the quilt from the machine. Stopping at the right point leaves room for the binding to turn without pulling the corner out of shape.
Fold the corner and stitch the next side
With the quilt lying flat, lift the loose binding strip up and away from the edge you have just stitched. Fold it diagonally so the strip runs in line with the quilt’s next edge. The diagonal fold should lead out from the corner at roughly 45 degrees. Keep that fold in place, then bring the strip straight down along the next side. Its raw edges should align with the quilt’s raw edge, while the horizontal fold at the top sits level with the quilt’s edge.
Begin stitching at the top edge of the new side, using the same seam allowance as before. The folded layers at the corner should form a small, tidy flap rather than a tight knot. Repeat this stop, diagonal fold, downward fold and restart at every corner. If a corner looks uneven, unfold it and check the alignment before sewing on; correcting a fold now is easier than adjusting a finished edge.
Join the ends and turn the binding
When you return to the starting side, stop with enough space to join the two loose tails without stretching them. One way to make a low-bulk join is to overlap the tails by an amount equal to the width of the binding strip before it was folded, trim the excess, then sew the ends together on a diagonal. Check that the strip is not twisted and that it lies flat against the remaining quilt edge before trimming the diagonal seam allowance. Finish stitching the binding to the front.
Fold the binding over the raw edge to the back. Along each side, aim for the folded edge to cover the line of stitching that attached the binding to the front. At a corner, fold one side over first and then fold the adjoining side over it, arranging the diagonal crease into a neat miter. Hold it with a clip while you check the shape from both sides. The front and back miters may fold in opposite directions; what matters is that each lies flat and covers the raw edge.
Secure the back and check the corners
For an unobtrusive finish, hand-stitch the folded binding edge to the back with small stitches that catch the backing without going through to the front. Catch the corner fold as you pass it so the miter stays closed. You can also machine-stitch the binding, but check frequently that the stitching catches its folded edge on the back, especially at corners where the layers are thicker.
Give the finished binding a light press if the fabrics tolerate it, then inspect each corner. A crisp corner should sit flat, cover the quilt’s raw edges and feel secure when gently handled. If one looks rounded or bulky, the cause is often a fold that slipped out of alignment or stitching that continued too close to the edge before the turn. A few careful stitches or a small adjustment to the fold may be all it needs.


