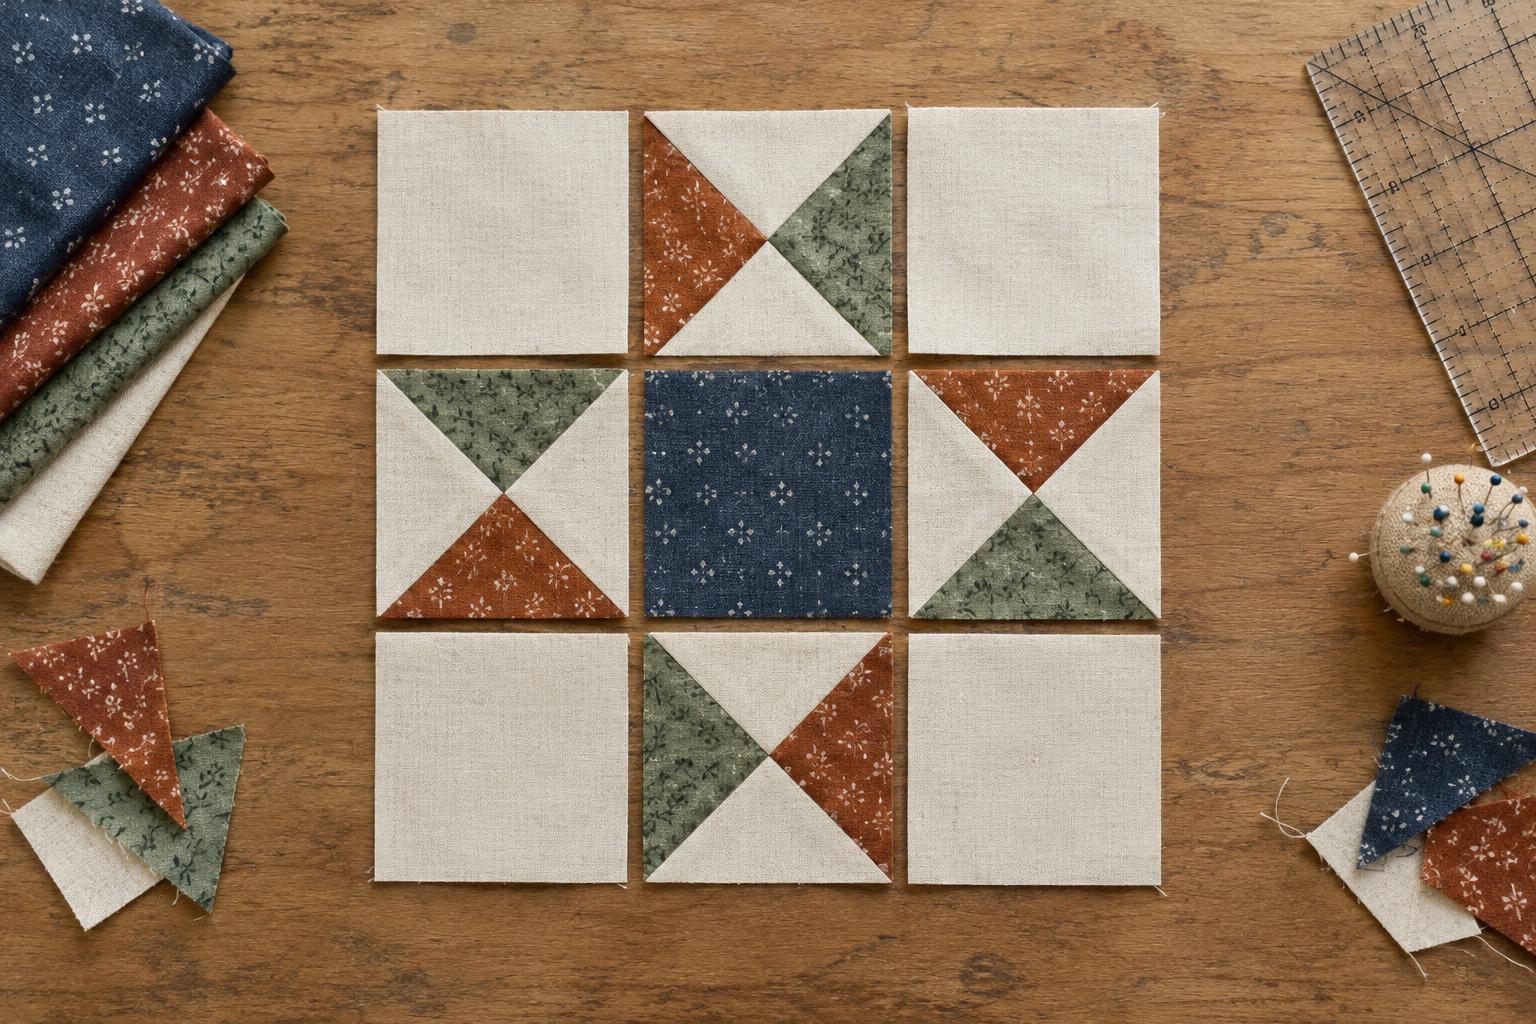
Start with a three-by-three map
The Ohio Star is built on a nine-patch grid: three equal units across and three down. Its centre is a single square, and the four corners are squares too. The remaining four positions—above, below and beside the centre—hold quarter-square triangle units that create the star points. Keeping those positions clear in your mind makes the block easier to plan than trying to follow the outline of the star alone.
Before cutting fabric, sketch nine boxes on paper. Mark the corner boxes as background, the middle box as the centre, and the four side boxes as point units. This simple map helps you estimate how much of each fabric will show. It also gives you a layout to consult when the pieced units are ready to arrange.
Orient the point units before sewing
Each point unit contains four triangles meeting near its middle. In a familiar two-colour Ohio Star layout, two opposite triangles use the star fabric and the other two use the background fabric. The direction of those opposing triangles matters: the star triangles should point outward toward the block edge and inward toward the centre.
Lay out the top and bottom units so their star triangles run vertically. Turn the left and right units so theirs run horizontally. Then step back and check the overall shape. You should see points reaching toward all four outside edges, with colour drawing your eye back toward the centre square. If one unit looks disconnected, it may simply need a quarter turn.
Make this check before joining any rows. Quarter-square triangle units can look nearly interchangeable in a stack, especially when the prints are similar in value. Placing every unit on your sketch or design surface first is quicker than unpicking a rotated unit later.
Give the corners and centre distinct jobs
The corner squares provide breathing room around the star. When they match or closely resemble the background triangles in the point units, the background looks continuous and the star outline reads clearly. A contrasting corner fabric can create a lively secondary pattern when several Ohio Star blocks sit together, but it may also draw attention away from the points. Try both arrangements with loose pieces before committing.
The centre square anchors the design. Using the star fabric there creates a strong, unified shape; a different print makes the centre a small focal point. A busy centre can work well beside quieter star fabric, while a simple centre gives detailed prints in the points more room to shine. There is no required colour placement beyond the geometry of the block, so use the layout stage to decide what you want viewers to notice first.
Value—how light or dark a fabric appears—can matter more than colour name. If the star and background are close in value, their edges may appear softer. That may be exactly the effect you want; for a more defined star, choose fabrics with a clearer light-dark difference.
Piece for matching edges, not just a finished shape
Choose a finished block size divisible by three so every grid position is the same size. For a 9-inch finished block, each position finishes at 3 inches. With quarter-inch seam allowances, cut the five plain squares—the four corners and centre—at 3½ inches. Make the four quarter-square triangle units slightly oversized using a method you are comfortable with, then trim each to 3½ inches unfinished. Check that the central seam intersection sits near the middle as you trim.
Arrange the nine units in three rows and confirm the point directions again. Sew each row, taking care not to stretch the bias edges in the triangle units. Press seams in a direction that lets adjoining row seams nest where practical, or press them open if that gives you flatter joins. Join the rows while matching the grid intersections. The assembled block should measure 9½ inches unfinished if your seam allowances and trimming are consistent.
If an intersection is slightly off, first check whether the point units are square and equal in size. Consistent units usually make the final row seams easier to align than forceful pinning does.
Try a small layout experiment
One Ohio Star is a useful practice block; four make a compact design study. Piece four blocks with the same star and background fabrics, then vary only the centre squares. Lay the blocks together and notice whether your eye follows the repeated points or pauses at each centre. Next, rotate the blocks or add plain squares between them to see how the corner areas influence the space between stars.
This experiment works without making a full quilt. The blocks could become a cushion front, a table piece or the beginning of a larger project. Whatever you make, keep the nine-patch map nearby: it is the simplest way to preserve the Ohio Star’s structure while changing its colours and personality.


