See the pinwheel before you sew
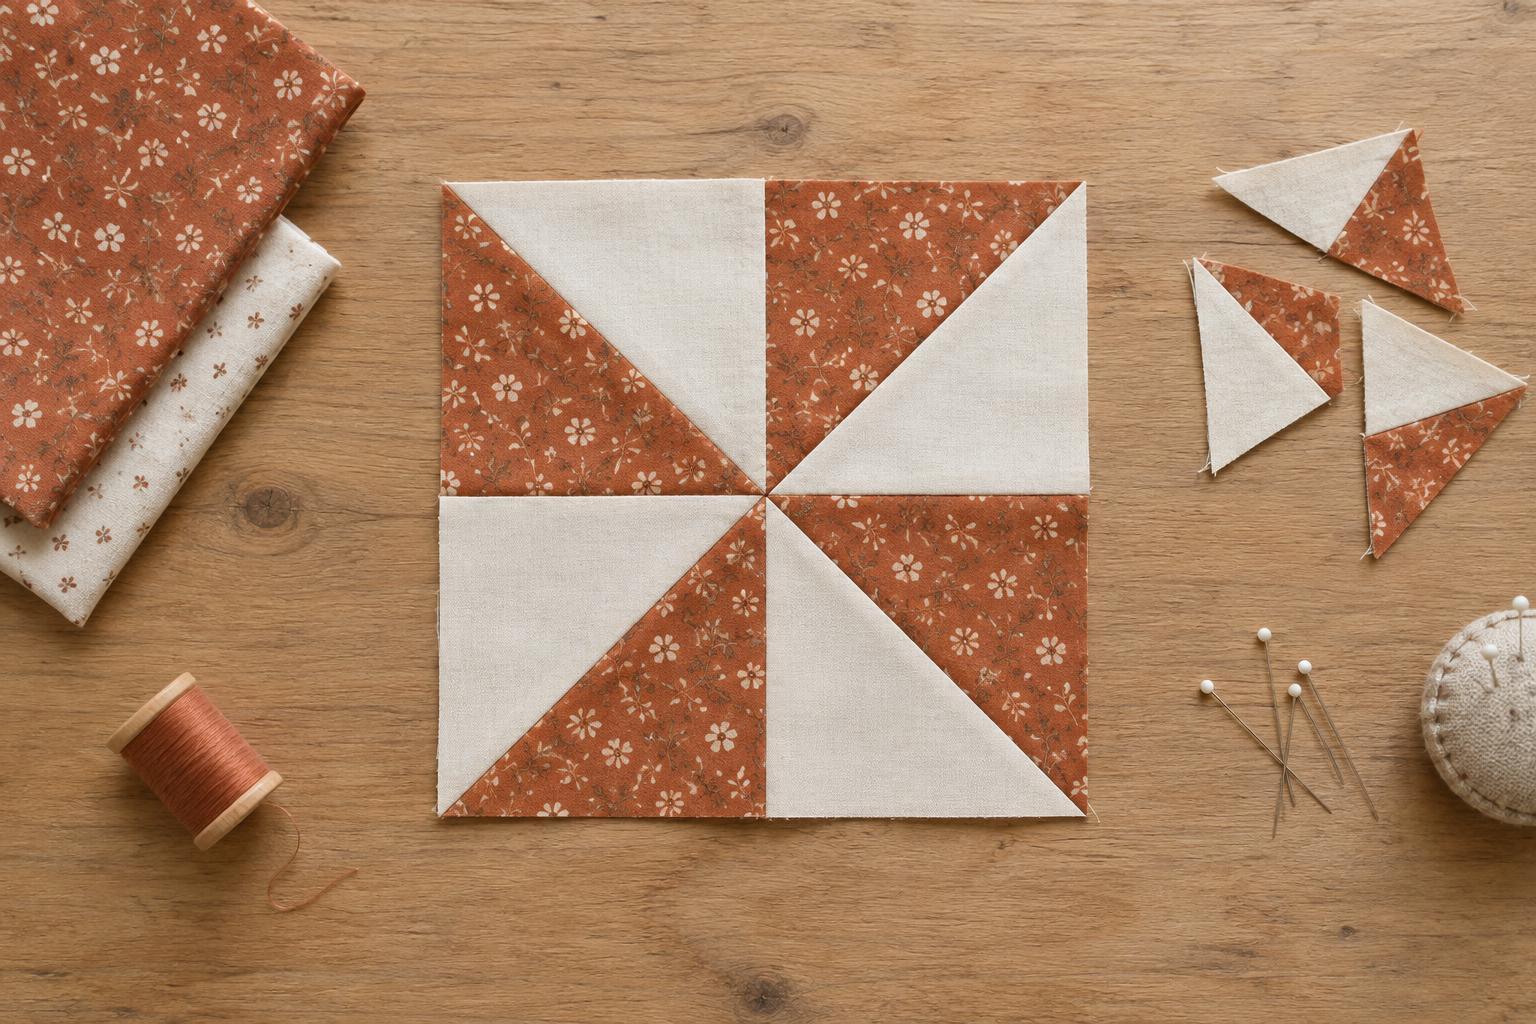
A classic pinwheel block is a two-by-two arrangement of four half-square triangle units, often called HSTs. Each unit contains one triangle of each fabric. The diagonal seams point from the four outer corners of the block toward its centre, where they meet. With a light and a dark fabric, the dark triangles appear to turn around that meeting point like four blades.
Layout matters as much as accurate sewing. Place the four units on a table before joining them. Start with one unit, then move clockwise around the block, rotating each following unit a quarter turn clockwise. Check that every diagonal seam leads from an outer corner to the centre and that the dark triangles follow the same direction around it. If the shapes look like separate diamonds or an hourglass rather than a spinning wheel, turn the units until the four diagonal seams converge.
Choose a size and make four matching units
Decide on the finished size of the block first. Each HST finishes at half the block’s width and height. For example, an 8-inch finished pinwheel needs four HSTs that finish at 4 inches each. Before assembly, each HST should measure 4½ inches square; the extra ½ inch provides seam allowances on both sides.
A convenient method makes two HSTs at once. For the 8-inch block, cut two 5-inch squares of the light fabric and two 5-inch squares of the dark fabric. Pair each light square with a dark square, right sides together. Draw a corner-to-corner line on the back of one square in each pair. Sew ¼ inch from both sides of the line, cut on the drawn line, and press the resulting units. Trim all four HSTs to 4½ inches square, keeping the diagonal seam aligned with the ruler’s diagonal. Cutting slightly larger and trimming helps the units match, but check that your seams leave enough fabric for the target size before trimming.
Join the block without losing the centre
Return the trimmed units to your chosen layout. Sew the two units in each row together with a consistent ¼-inch seam allowance. Then join the rows, matching the vertical seam at the centre and pinning if the layers tend to shift. A small difference at this point is noticeable because all four diagonal seams draw the eye inward.
Pressing can make that intersection easier to manage. Press the seam in the top row in one direction and the seam in the bottom row in the opposite direction so they nest when the rows meet. If the centre feels bulky, gently press the final seam open instead. Let the block cool flat after pressing, then measure it: an 8-inch finished block should measure 8½ inches square before it is sewn into a quilt. Avoid pulling the diagonal edges while handling the HSTs, as stretching them can make the finished block uneven.
Use fabric and colour to keep the motion visible
Strong contrast makes the pinwheel easiest to read. A light fabric against a dark or medium-dark fabric lets the eye follow the four blades even from a distance. Two fabrics of similar value can produce a softer effect, but the spinning shape may be less distinct. If you are unsure, place the fabrics side by side and consider whether their lightness differs enough to show a clear edge.
Print scale also changes the result. A small, even print usually behaves much like a solid, while a large motif may look different in each triangle after cutting. That variation can be appealing, but it may compete with the pinwheel outline. For a first block, try one quiet fabric and one more expressive print. Make a sample before cutting a whole quilt so you can judge the contrast and see how your chosen pressing method affects the centre.
Turn one block into a patchwork plan
Repeated pinwheels can make a lively quilt without adding new block shapes. Set identical blocks in straight rows for a regular rhythm, or alternate them with plain squares to give each wheel room to stand out. Sashing—strips between blocks—separates busy prints and makes the individual spinning motifs easier to see.
For more movement, make some blocks with the light and dark positions reversed. Lay out every block before sewing the rows, and step back to check whether your eye moves comfortably across the whole arrangement. You can also use a limited group of related colours for the blades while keeping the background fabric consistent. The construction stays the same; the choices you make in contrast, spacing, and repetition determine whether the finished patchwork feels calm or energetic.


