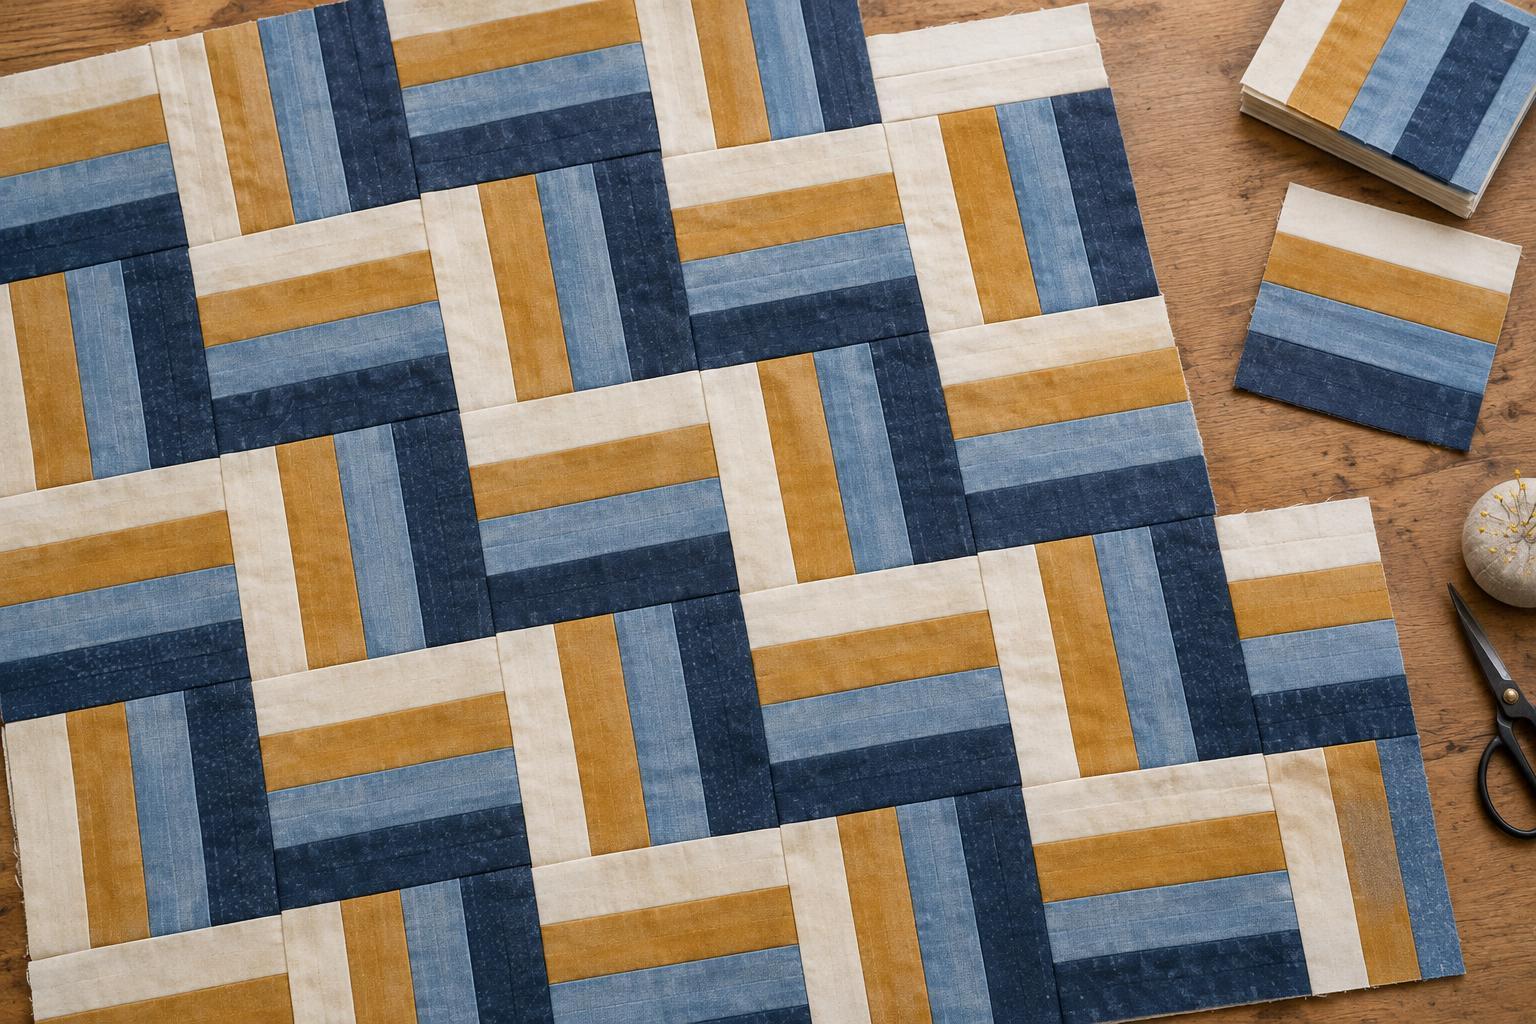
How a Rail Fence block becomes a pattern
A Rail Fence block is made from parallel fabric strips sewn together and cut into squares. The construction is straightforward, yet the finished quilt can look surprisingly varied. Rotate some blocks a quarter turn and the strips begin to change direction across the quilt. Repeated in rows, those changes can suggest steps, diagonal movement or a zigzag.
The key is to plan the arrangement before joining the blocks. A single block shows three straight bands; the pattern emerges when its colours and orientation interact with its neighbours. You do not need a complex cutting template, but you do need enough contrast to see the direction of the strips from a short distance away.
Choose strips with a clear light-to-dark order
For a first zigzag layout, choose three fabrics: one light, one medium and one dark. Sew them in the same order for every strip set. This consistency makes rotation easy to read. If the fabrics are all similar in value, the quilt may still be attractive, but the zigzag will be quieter. Prints can work well; look at their overall appearance rather than judging each small detail.
Equal-width strips make square blocks easy to plan. For example, sew three strips cut 2½ inches wide with ¼-inch seam allowances. The strip set should measure about 6½ inches across. Cut it into 6½-inch lengths to make unfinished squares that finish at 6 inches once joined into the quilt. Measure your first strip set before cutting all the blocks, since small differences in seam allowance can affect the result.
Piece, press and cut the blocks
Place the first two strips right sides together and sew along one long edge. Add the third strip in the planned colour order. Press the seams to one side, taking care not to stretch or bow the strip set. If you make several sets, pressing their seams in opposite directions can help adjoining blocks nest at some intersections. A small test layout will show where that is useful.
Straighten one short end of each strip set before measuring and cutting your squares. Align a ruler with the seams as well as the outer edge: a square cut from a skewed strip set can be difficult to fit into a tidy row. Keep the blocks in stacks with the light-to-dark order facing the same way. They are simple to rotate deliberately, but also simple to turn by accident while carrying them to the sewing machine.
Rotate blocks to build the zigzag
Lay out the blocks on a design wall, bed or clean floor before sewing rows. Begin with one block's strips horizontal. Turn the next block a quarter turn so its strips are vertical, and continue alternating directions across the row. In the next row, try starting with a vertical block. This creates a regular framework of changing directions; then adjust individual blocks to guide the light or dark bands along a zigzag path.
Do not worry if the first arrangement looks more like a checkerboard of stripes than a zigzag. Compare blocks at their shared edges. When a dark band reaches an edge, rotate or exchange a neighbouring block to see whether the dark areas form a more convincing step. Repeat the same turning point across the quilt for a steady rhythm, or space the turns farther apart for a broader zigzag. Step back from the layout often: a design that is hard to read close up may be clear from across the room.
Once you like the arrangement, take a reference photo or label the rows. Join blocks into rows, checking each orientation against the layout before sewing. Press row seams in alternating directions where practical, then join the rows. Taking this pause preserves the pattern you planned without adding difficulty to the piecing.
Make the design your own
A limited palette gives the zigzag a crisp outline, while scraps of similar light, medium and dark values add variety without losing the underlying structure. You can also place a narrow border around the finished patchwork to give the moving lines a quiet edge. Before cutting border fabric, measure the quilt through its centre rather than relying on an outer edge that may have stretched.
For a manageable first project, make a small group of blocks and experiment with several arrangements before committing to a larger quilt. The same blocks can produce noticeably different effects simply by changing their rotation. That freedom is the appeal of Rail Fence: the sewing stays familiar while the layout becomes a place to play.


