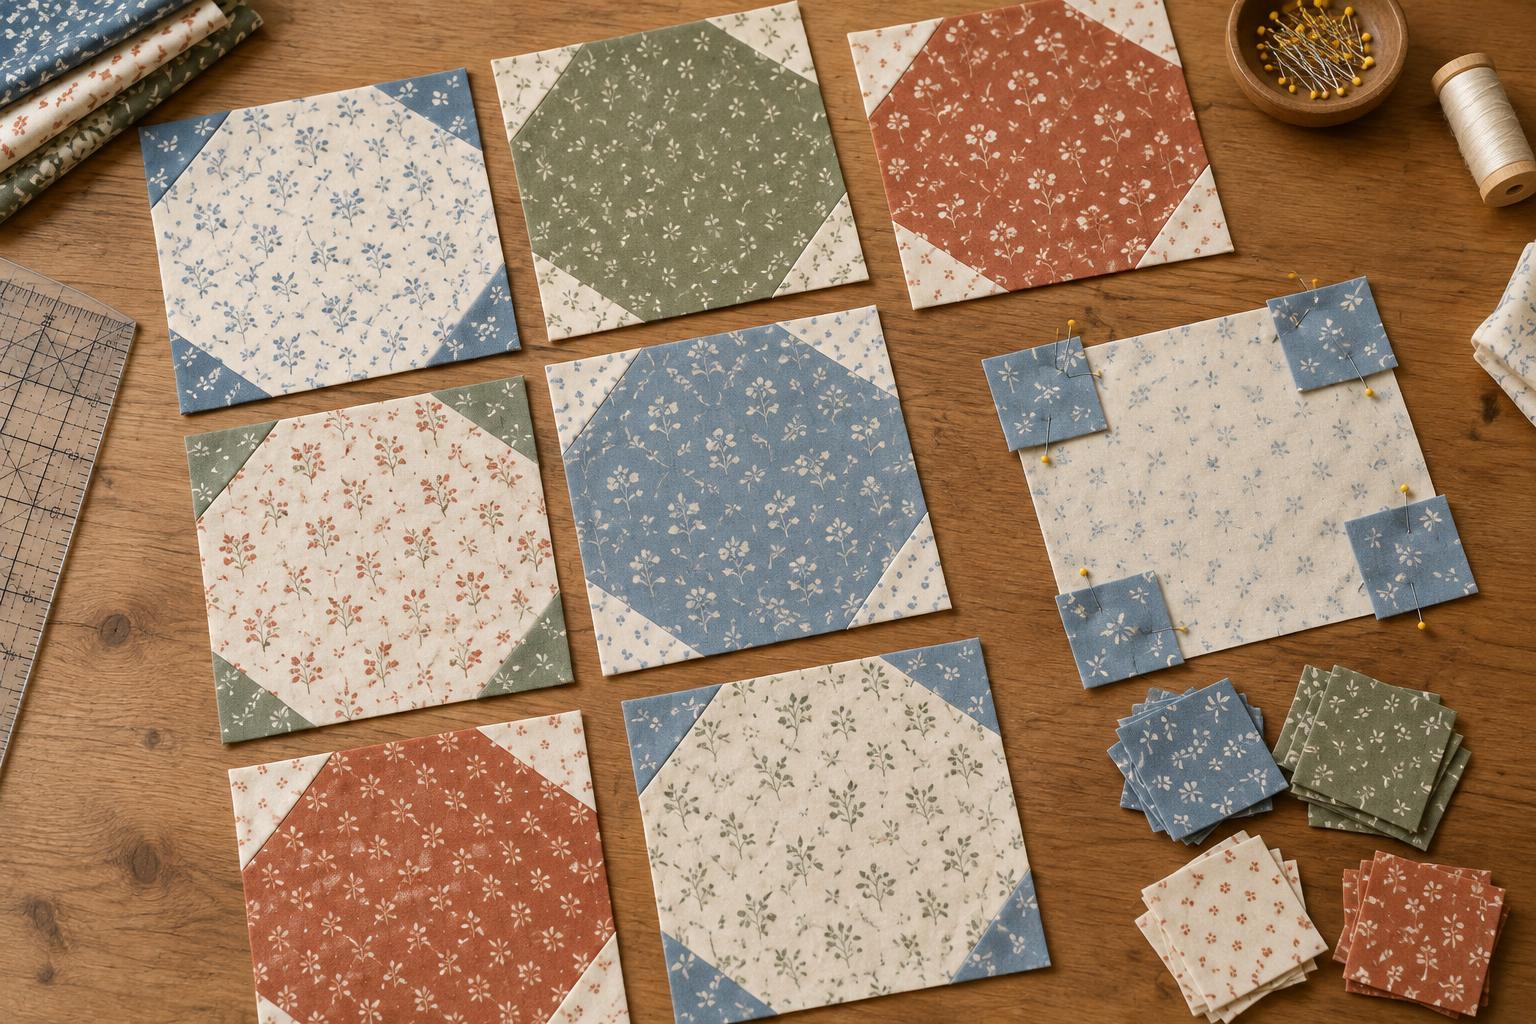
Why a snowball block looks rounded
A traditional snowball block begins as a fabric square with a contrasting triangle at each corner. Those triangles cut across the square’s sharp corners, leaving an eight-sided central shape. From a distance, its clipped edges can look almost round, even though every seam is straight. It is a useful pattern if you want the softness of curved shapes without sewing curves.
Snowball blocks work on their own or alongside other patchwork blocks. A row of identical snowballs creates a steady rhythm; alternating them with nine-patch blocks can make the corner triangles form secondary shapes where the blocks meet. The effect depends on contrast. If the centre fabric and corner fabric are similar in value, the outline will be subtle. A clear light-and-dark difference makes it easier to see.
Choose the square and corner proportions
Start with one large square for the block centre and four smaller squares for its corners. The large square determines the block’s unfinished size: an 8½-inch square, for example, should still measure 8½ inches after the corners are sewn and pressed. It will finish at 8 inches in a quilt assembled with ¼-inch seams.
Corner size changes the appearance considerably. Small corner squares make a broad, nearly square centre with only its tips clipped. Larger corner squares give the centre shorter straight sides and a more rounded-looking outline. For a first sample, try an 8½-inch centre square with four 2½-inch corner squares. This is a starting point, not a required proportion. Make one test block before cutting a whole quilt so you can judge the shape at full size.
Consider how the corner fabric will behave across the layout. Using the same fabric for all four corners can give each centre a consistent outline. Choosing a background fabric that also appears between blocks may make the snowballs look as though they float. Prints can work well for either piece, but a busy print may soften the boundary you are trying to show.
Sew four corners with straight seams
On the wrong side of each small square, mark a diagonal line from one corner to the opposite corner. Place a small square right sides together on one corner of the large square, aligning both outer edges. Check that the marked line crosses the corner diagonally, joining a point on each outer edge of the large square. Sew along the line using a consistent stitch length.
Before trimming, fold the free half of the small square outward toward the block corner. Its edges should meet the original edges of the large square. If it falls short, check the seam position and try another corner before continuing. Once the fold looks right, unfold it and trim the excess fabric beyond the seam, leaving about a ¼-inch seam allowance. Fold the triangle back over the corner and press. Repeat at the other three corners.
A gentle press helps keep the block flat; avoid pulling the corner triangle while it is warm from the iron. Check the finished unit against a ruler. If its edges are uneven, identify whether a corner was misaligned or a seam was sewn too far from the marked line. Correcting the method on a sample is easier than trimming many undersized blocks later.
Turn simple blocks into a pattern
Lay out several blocks before joining them. With light corners and darker centres, each snowball reads as a separate softened shape. With dark corners, the meeting points between blocks may attract more attention and create a second pattern. Try rotating printed centre squares so their designs point in different directions, or keep directional prints aligned for a calmer result.
You can also alternate snowballs with plain squares or other blocks of the same unfinished size. Look at the junctions, not only the individual blocks: four corners meeting can suggest a small diamond, while corners beside a contrasting block can form a zigzag. Take time to rearrange the blocks until both the main shapes and the spaces between them feel balanced.
Sew blocks into rows with a consistent ¼-inch seam allowance, then join the rows. Because the construction relies on squares and straight stitching, snowballs are suitable for practising accurate cutting and seam alignment. Their visual effect comes from proportion, contrast and placement rather than complicated piecing.


