How the rings take shape
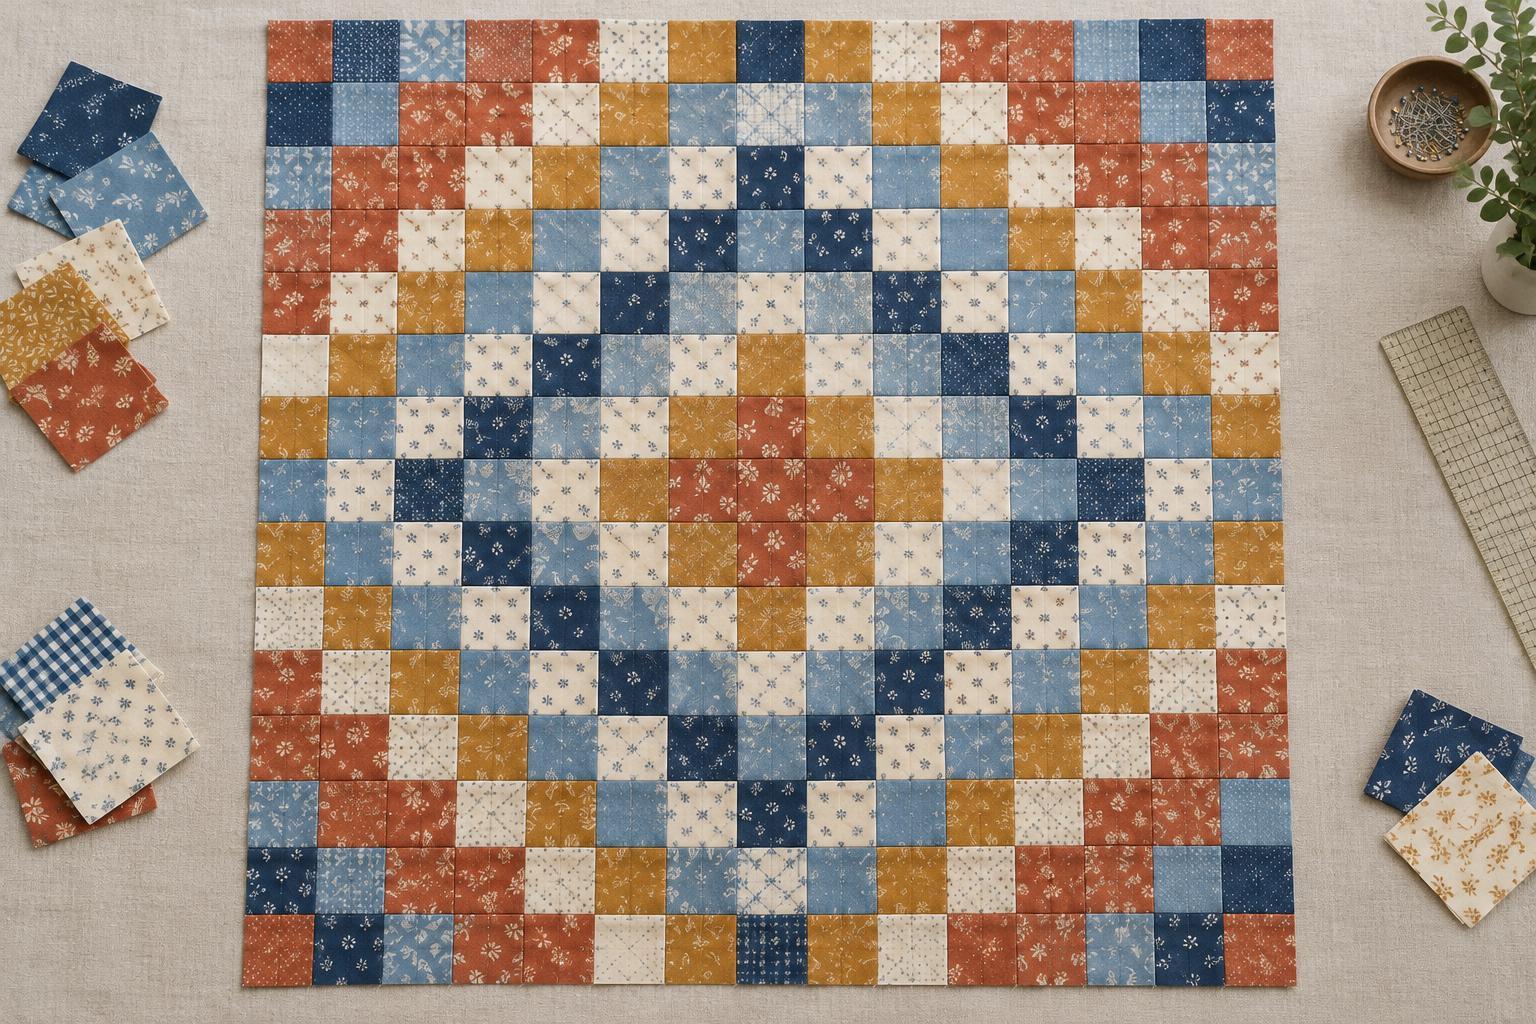
A Trip Around the World quilt makes a striking pattern from one of the simplest patchwork units: the square. Colours travel outward from the centre in bands, creating a series of diamonds. Each band is made of individual squares whose corners touch along the diagonal. Once you see that relationship, the layout becomes much easier to plan.
These are not square borders built one after another. On a grid, the four squares immediately above, below, left, and right of the centre begin the first diamond ring. The next ring sits one step farther from the centre, and the pattern continues toward the edges. The outer diamonds may be cut off by the straight sides of the quilt; that is a normal part of the design.
Plan a small layout before cutting
Start with a 9-by-9 grid drawn on paper or made with loose fabric squares. Its 81 positions give you a single centre square and enough space to see several colour changes. Choose five fabrics labelled A through E. Put A in the centre, then use B, C, D, and E for the next four rings. Moving farther outward, reverse the sequence: D, C, B, and A. This creates a balanced colour rhythm without requiring nine different fabrics.
To find a square’s ring, count how many rows it is from the centre and how many columns it is from the centre, then add those two numbers. A square one row up and one column across is in ring two; a square two rows up and one column across is in ring three. Marking ring numbers on a paper grid lets you check the whole design before you cut. If you prefer to work by eye, lay out the centre and build each diamond outward, checking all four sides as you go.
Choose colours that make the diamonds readable
The pattern depends on neighbouring rings looking different enough to separate at a glance. Try alternating lighter and darker fabrics, or place a quiet print beside a busier one. Fabrics do not have to be solid: small-scale prints can read as a single colour from a distance, while large motifs may make a ring appear less continuous. Step back from your layout occasionally to judge the overall effect rather than each square on its own.
Repeating the same fabric in the centre and outer corners can give the design a sense of connection. For a more varied look, use several fabrics of similar colour or value within one ring. Arrange those squares evenly around the centre so one side does not look unexpectedly heavier. A photograph of the loose layout can help you spot misplaced squares before sewing.
Cut, arrange, and sew the grid
Decide on a finished square size, then add seam allowance on every side. With a quarter-inch seam, a square intended to finish at 3 inches is cut at 3½ inches. A 9-by-9 layout made from 3-inch finished squares will finish at 27 inches square before any border. Accurate cutting matters because small differences can accumulate across nine squares in a row.
Lay out all the pieces on a flat surface in their final positions. Sew the squares together row by row, keeping each completed row labelled or in order. Press seams in alternating directions on neighbouring rows so the seams can nest when you join the rows. Pin at the intersections if that helps keep corners aligned. After every few rows, compare the sewn piece with your grid: a colour placed one position away from its intended spot can interrupt a diamond.
You can make a larger quilt by adding rows and columns to the plan or by using larger squares. Before cutting for either change, draw the expanded grid and check where its outermost rings will meet the edges. That quick sketch helps you decide whether the design feels complete as it is or would benefit from a plain border.
Make the layout your own
The same grid offers room to experiment. A narrow range of related colours can make the movement gentle, while strong light-and-dark changes make the diamonds more prominent. You might place one bold fabric in a middle ring to create a focal point, or keep every ring distinct for a crisp, graphic quilt.
For a first attempt, consider making a small wall hanging or cushion front from your planned grid. It gives you a chance to practise keeping rows in order and matching intersections without committing to a large quilt. Whatever size you choose, take time to test the arrangement before stitching: in a Trip Around the World pattern, careful placement does much of the design work.


